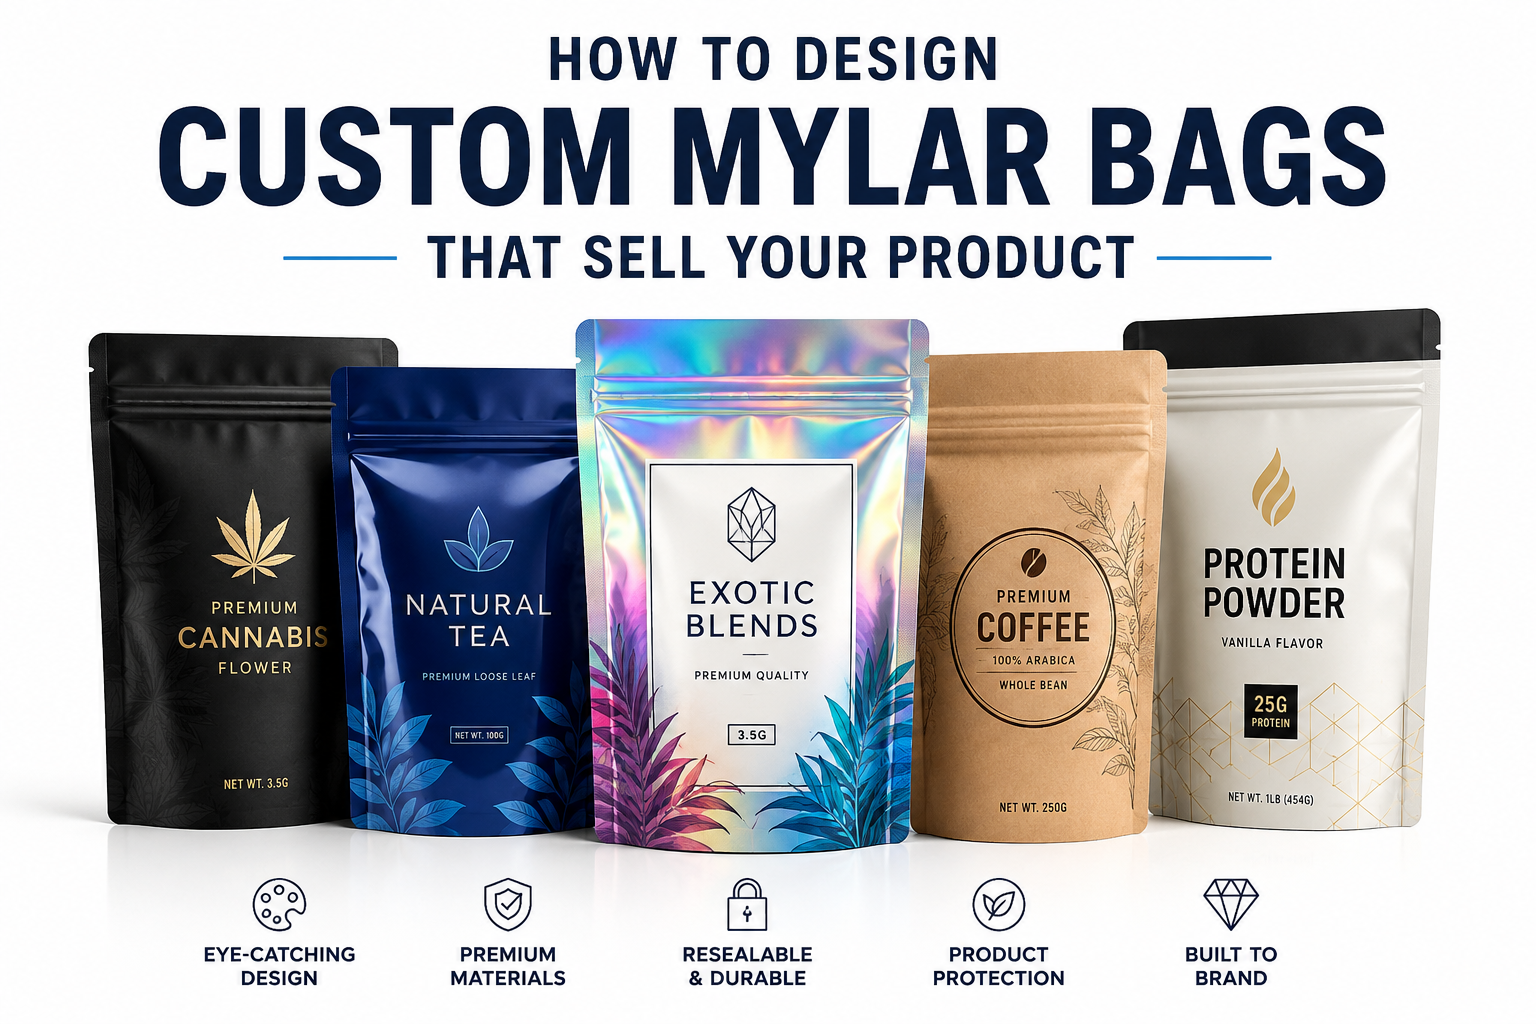
How to design custom mylar bags is a question most brands answer in the wrong order. They spend three weeks debating logo placement and matte versus gloss. Then two weeks before they need inventory, they realize they never confirmed the film thickness, closure type, or whether their product requires child-resistant certification.
The creative conversation matters. It is just not the first one.
This guide covers both in the right order.
How to Design Custom Mylar Bags: Start With Structure, Not Aesthetics
Every successful custom bag design sits on top of a set of structural decisions. Get the structure wrong and no artwork fixes it.
Choose Your Bag Size Based on Product Volume
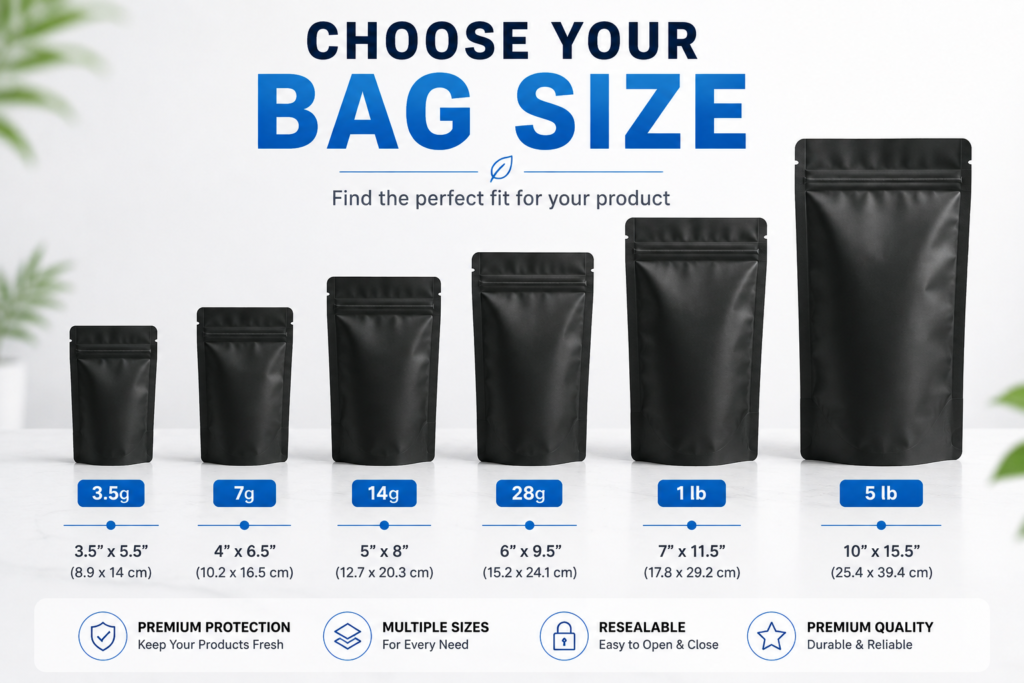
Bag dimensions are determined by the volume and weight of the product inside, the fill headspace required above the product for sealing, and the shelf footprint the format needs to achieve. Most suppliers offer standard sizes from 3.5 gram single-serve portions through to 5-pound bulk bags. Custom dimensions are available but add lead time and cost. If your product fits a standard size, customize the print rather than the die.
Select the Right Format for Your Sales Environment
The format is the structural shape of the bag before any print is applied.
Stand-up mylar bags are the dominant retail format. The bottom gusset creates a stable base that holds the bag upright without support and gives you printable surface on the front panel, back panel, and bottom gusset. For most consumer product categories this is the default starting point.
Flat-bottom bags have a structured rectangular base that holds its shape when partially empty. They communicate premium positioning before a customer reads anything on the label. Specialty coffee brands use flat-bottom almost universally because the format does brand work that print alone cannot accomplish.
Three-side seal bags are the simplest and most cost-efficient format, used for samples, sachets, and products where the bag is a functional container rather than a branding vehicle.
Confirm the Film Specification Before Artwork Is Built
This is the step most brands skip. The film specification determines the oxygen transmission rate, moisture vapor transmission rate, mil thickness, and whether the bag has a genuine aluminum foil layer or a metalized PET coating that looks similar but performs at a significantly lower barrier level.
A 3.5 mil film behaves differently under print than a 7 mil film. A matte laminate finish over a foil laminate looks and feels different from the same finish over a metalized PET. Confirm the film spec with your supplier before the artwork file is built, not after the first proof comes back wrong.
Understanding Mylar Bag Layers and How They Affect Design Decisions
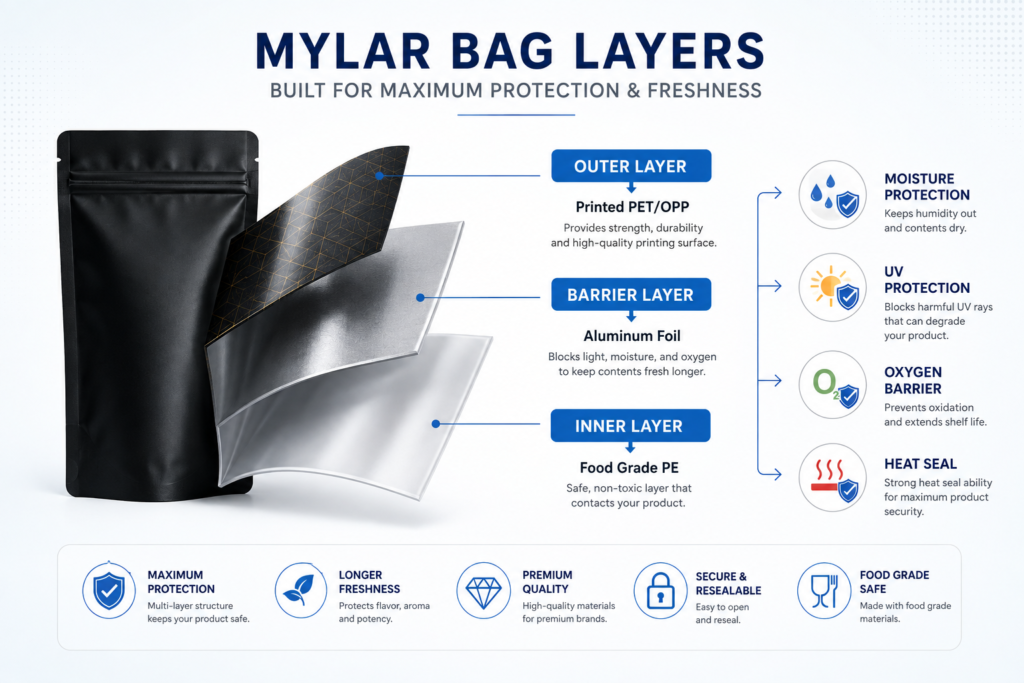
A standard mylar bag has three to four laminated layers, each doing a specific job.
The Outer Layer
This is the printable surface, typically OPP or PET film. It is where your artwork, brand colors, product information, and regulatory text live. The outer layer determines which print methods are compatible and which surface finishes can be applied.
The Barrier Layer
The aluminum foil middle layer blocks oxygen, moisture, UV light, and odor. If you are considering a clear window in your design, the window replaces a section of the foil layer with transparent film. That means the window area has a significantly higher oxygen transmission rate than the rest of the bag. For oxygen-sensitive products, this is a structural tradeoff worth understanding before you commit to a windowed design for aesthetic reasons alone.
The Inner Layer
The polyethylene inner layer is the food-contact surface and the heat-sealable layer. It must be FDA-compliant for any product that contacts it directly. Full FDA food contact material requirements are published at fda.gov. This layer is not printable and not visible in the finished bag, but it is what makes the bag safe and what creates the airtight seal.
How to Build Custom Mylar Bag Artwork That Survives Production
Most print problems on finished bags trace back to artwork built without understanding how mylar printing works in practice.
Set Up Files in CMYK at 300 DPI Minimum
Mylar printing uses CMYK color profiles. Artwork built in RGB and converted at pre-press produces color shifts significant enough to reject a first proof. Build the file in CMYK from the start at 300 DPI minimum at the final print size.
Keep Critical Elements Inside the Safe Zone
Every bag format has a dieline showing the dimensions, fold lines, seal areas, and safe zones. Critical information including your brand name, logo, regulatory text, and barcodes must sit inside the safe zone. Artwork bleeding into the seal area gets distorted or cut off in production. Ask for the dieline specific to your bag size and format before building any artwork.
Design for the Finish Before the Proof
Matte finishes absorb light and read as premium. Gloss finishes make colors appear more saturated. Spot UV applies a gloss coating to specific elements of a matte bag, creating contrast that draws the eye to key design features.
Holographic mylar bags use a prismatic film that refracts light across the entire surface. Dark ink colors absorb the holographic effect while lighter and transparent areas let it show through. Artwork built for a standard matte bag and transferred directly to holographic film without redesigning for the substrate produces results that rarely match expectations. Design for the finish, not after it.
Compliance Elements That Must Be Built Into Your Design From the Start
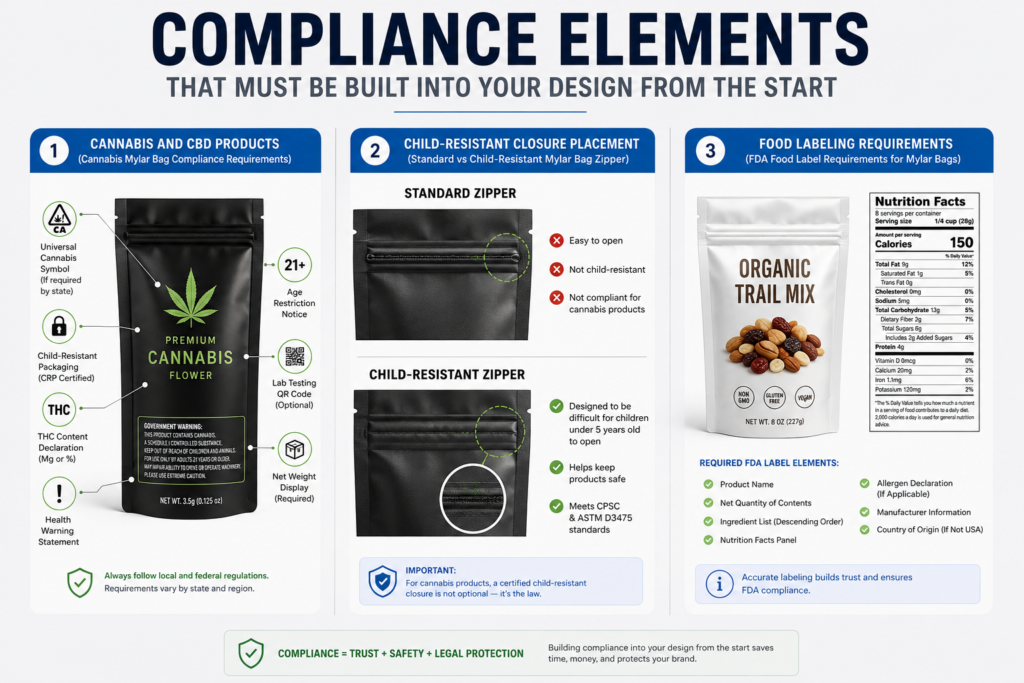
For regulated product categories, compliance text is a design constraint, not a finishing detail.
Cannabis and CBD Products
State-level US regulations require specific warning text, THC content disclosures, and in most states, opaque packaging that prevents the contents from being visible. Custom weed mylar bags need to incorporate all mandated text in legible font sizes and display required symbols. Design the compliance elements first and build the brand elements around them. Designing the brand first and squeezing compliance text in afterward is how layouts end up non-compliant or visually broken.
Child-Resistant Closure Placement
If your product requires child-resistant mylar bags certified to ASTM D3475, the zipper placement affects the usable print area on the front panel. Child-resistant zippers sit lower on the bag than standard resealable zippers, changing the proportions of the front panel design space. Factor the zipper position into the layout before the artwork is built.
Food Labeling Requirements
FDA labeling requirements under 21 CFR Part 101 specify mandatory elements including net weight, ingredient list, nutritional information, and allergen declarations, each with minimum font size requirements. On bags with limited panel space, labeling requirements often determine the layout before the brand creative does.
Not sure what structural decisions to make before you design? Contact our team before you send artwork anywhere. We walk you through the dieline, compliance requirements, and film spec for your specific product first.
How to Review and Approve a Custom Mylar Bag Proof
A digital proof shows how the artwork appears when printed. It is useful for checking layout and approximate color relationships but does not show how the finish behaves on the physical material or how the bag feels in hand.
A physical sample is an actual printed bag using the production film and print method. It is the only proof that shows you what the finished product actually is before production commits. Pay for it. The cost of a physical sample is always less than the cost of a production run that does not match what was expected.
Check color accuracy against your brand standard, text legibility at minimum regulatory font sizes, zipper operation through 20 open and close cycles, and heat seal integrity at the corners before approving any production run.
Frequently Asked Questions About Designing Custom Mylar Bags
What file format should I submit for custom mylar bag artwork?
Most professional suppliers require print-ready PDF files in CMYK color mode at 300 DPI minimum. AI and EPS files are also commonly accepted. Always request the supplier’s dieline template before building artwork and confirm whether they require outlined fonts before submitting the file.
Can I add a clear window to my custom mylar bag?
Yes, but the window replaces a section of the aluminum foil barrier layer with transparent film, which increases the oxygen and moisture transmission rate in that area. For products sensitive to oxidation, a small accent window is a reasonable compromise. A full front-panel window is a meaningful barrier reduction that may affect shelf life and should be discussed with your supplier before committing to the design.
What is the minimum order quantity for custom mylar bags?
Digital printing allows smaller runs of 500 to 1,000 units because it does not require printing plates. Gravure printing produces lower cost per unit at higher volumes but typically requires 5,000 units or more to offset plate setup costs. For brands testing a new design, digital printing at lower minimums is almost always the right starting point. Browse the full custom mylar bag range for format and order quantity options.
How long does custom mylar bag production take?
Digital printing typically produces finished bags in 10 to 15 business days after artwork approval. Gravure printing runs longer due to plate production and setup. Confirm the lead time at the start of the project, not after artwork is approved, to avoid supply chain delays.
Do I need different artwork files for different bag formats?
Yes. Each format has a different dieline with different panel dimensions, fold positions, and seal area locations. Artwork built for a stand-up pouch cannot transfer directly to a flat-bottom bag without layout adjustments. Always request the dieline for the exact format and size you are ordering before building any artwork.
Ready to move from design to production? Request a free quote and get a response within 24 hours. We handle the dieline, compliance review, and physical sample before anything goes to a production run.